Showing posts with label recipes. Show all posts

Monday, July 9, 2012

Changburgers


Summer has finally arrived in Seattle. Traditionally, it begins the day after July 4 and this year decided to be traditional. Chrissie and I decided to take advantage of the nice weather while it was here by doing some grilling. Here's a recipe for my favorite grill item: changburgers (fancy hamburgers). The recipe is adapted from Julia Child's ground beef recipe. Instead of thinking of burger patties as only 95% meat and 5% fat, I think of it as more like a well seasoned meatball now.

1 lb ground meat ***
1/4 lbs finely minced yellow onion
1 tsp salt
1/2 tsp pepper
1 tsp thyme
1 Tbsp Parsley
1/4 Cayenne pepper
3 Tbsp Worcestershire Sauce

Feel free to season to taste. I rarely use exact measurements anymore and just eyeball it. Also, feel free to experiment with different ingredients. I try different herbs often. This is the most consistent combination I go to. Not surprisingly, all of these ingredients go really well with meat in general, so you might take a cue from what pairs well with beef in other dishes.

Optional: 1 egg. Adding the egg with help the patties maintain their shape after they've been formed.

Mix all the ingredients together in a bowl. Cover the bowl with plastic wrap. Refrigerate until you are ready to use.


When you are ready to form your patties, you can do it by hand or use a mold. Doing it by hand will keep the patties "fluffier" and lighter. I really like these because the meat just falls apart when you bite into it. The difficulty with forming the patties by hand is that they are prone to falling apart before they get into your mouth. I would recommend adding the egg if you decide you're going to form them this way.

Admittedly, I use the mold more often. The patties stay together without help from the egg and that's important when things are going on the grill. I hate it when things fall through the grate.

Secret Ingredient: butter

Julia has taught me well
I stick the butter in the middle and cover it up with more meat

I stick a little bit of butter in the middle of all of my burgers. Here's a secret - fat equals juicy. I like juicy burgers. The butter here melts while the meat is cooking and spreads throughout the patty. It's delicious. You can probably use any kind of fat that is solid at cool/room temperature and melts when exposed to heat; I use butter because it's tasty and readily available.

After your patties have formed, they are ready to go on the grill. Cook to taste.

Cooking! Summer!

Bon Appétit!
Happy Summer everyone!


*** A note about the beef - the most important ingredient after all! Quality is important. A good rule of thumb is the closer to fresh you can get, the better tasting your burger is going to be. This is just as important for taste as it is for texture. Frozen meat will never be as good as fresh ground meat. Your chew count will reflect that. The three kinds of ground meat I've eaten have been burger patties from the frozen food section, ground beef from the grocery store meat section, and meat that I've ground myself the day of. The best one by far was the meat I ground myself. It's something I want to eat again and again. If you have a good butcher or grocery store, the stuff you get there will probably be pretty good, but in my experience it's too dry. The meat was probably ground a day or two ago and all the juices have seeped out. I will never eat patties from the frozen section ever again. If you don't believe me, there's a standing invitation to our table for changburgers. I promise you an awesome burger.

Sunday, June 24, 2012

Popcorn Love

Normally I'm pretty appalled by the egregious use of corn in the USA. Thanks to corn syrup and other bi-products, it's in everything. I mean, a nicely grilled ear of corn on the cob is one thing. Maybe I can get used to it in various starchy products like cereal and tortillas. But corn in my cookies? And ketchup? And even orange juice? Seriously people? There is really only one ingredient that should be involved in orange juice. I'll give you a hint: it starts with "O" and ends in "RANGE".

Nonetheless, when it comes to corn, popcorn is my Achilles heel (much to the chagrin of my dad who likens eating popcorn to stuffing your face with styrofoam). I love it served traditionally with just a little butter and salt. I adore freshly made kettle corn. There's just no going wrong with popcorn.

So I propose an exchange: here I will post our most reliable popcorn making technique and you all should leave a comment with your favorite variety of popcorn for us to try. I know there are a ton out there - I've seen them on pinterest! But, I want opinions from real people. What's the best? If you can't decide (I relate, I'm a libra), then just list all the ones you love! Feel free to leave the comments on facebook if that's easier for you. For now, I'll uphold my end of the bargain.


Perfect Traditional Popcorn

Ingredients:
3 tbsp canola oil
1/3 cup popcorn kernels
2-3 tbsp butter, clarified*
sea salt to taste

Instructions:
In a large pot that has a lid (I use a non-stick light weight dutch oven) heat the oil. Put about 3 kernels of popcorn in while it heats. Make sure the lid is on. (I like my dutch oven because it has a clear lid and I don't have to guess based on sounds).

Once the three kernels have popped, move the pot off the  heat (though not too far away) and add the rest of the kernels. Let them sit in the hot oil for about 30 seconds.

Move the pot back over the heat. Try to situate the lid so that there is room for air to escape, but not popcorn kernels.

Once the popcorn starts popping again, gently shake the pot back and forth over the heat to avoid any kernels getting burnt. I prefer to wear oven mitts while doing this because the steam gets really hot!

The popping will start to slow down. When you can just about count to 3 between pops take the pot off the heat and immediately transfer the popcorn to a bowl.  (Beware, a few kernels may try to keep popping on you!)

Top the popcorn with your clarified butter and sea salt. Serve immediately! (Tastes best while watching a movie with loved ones and/or friends)

*If you don't know how to clarify butter, that's okay. Just melt the same amount and it'll be fine. Clarifying it just takes it to the next level.

Sunday, June 17, 2012

Vichyssoise


Here's a quick hit on a tasty soup. It's out of Julia Child's "Mastering the Art of French Cooking." Leeks and potatoes are a couple of things we do pretty well up here in cloudy western Washington and I look forward to making this soup every spring. Interesting tidbit, Vichyssoise was actually invented in the US. It was adapted from the French Potato and Leek soup.

Recipe:
3 cups of peeled and sliced potato
3 cups of sliced white leek
1.5 quarts of chicken stock or broth
Salt to taste


Some prep pictures


Simmer all of these things together, partially covered, for 40-50 minutes, until the vegetables are tender.
OR use a pressure cooker; cook under 15 pounds of pressure for 5 minutes, release pressure, and simmer uncovered for another 15 minutes.

Apply heat

Mash the vegetables in the soup with a fork or pass the soup through a food mill.

0.5 to 1 cups of whipping cream
Salt and Pepper

Stir in the cream. Season to taste, oversalting very slightly as salt loses savor in a cold dish.
Chill the soup.

2 to 3 Tb of minced chives or chive flowers

Serve soup in chilled soup cups and decorate with chives.

Sunday, May 20, 2012

Maple Frosted Cupcakes

Okay, so I'm not known for how pretty I make my cupcakes. But this was super tasty.
So remember that coconut cake I made for my dad recently? I couldn't get the flavor and texture of the base cake recipe out of my head. It was so light and wonderful. Just the right amount of moisture and buttery-goodness.

Combine that with a sudden and intense need for all things maple and you get the above result.

I used the same cake recipe from the coconut cake, but decided to see how it would hold up as cupcakes. I cut the baking time down to 25 minutes and the recipe made about 24 cupcakes. They came out a little flatter than I might have liked, but the flavor and texture was still spot-on.

For the maple frosting, I augmented a basic buttercream. All these ingredients are approximations:

14-16 tablespoons unsalted butter
1/2 regular bag of powdered sugar
2-3 tablespoons milk
2 tablespoons maple extract

I started by creaming the butter and adding about 1/4 of the powdered sugar. I gradually added more sugar until I was about halfway through, then added the milk. Once the frosting was the right texture, I added in the maple extract and was happy as a clam.

I wanted to just eat all the frosting right out of the bowl. But then the exercise in making cupcakes would have seemed silly.

In the end, I was happy to exercise some restraint. The maple frosting with this cake was divine. Maple bars are a thing of my past. HELLOOO maple cupcakes!

Sunday, May 13, 2012

Easy Stir Fry Vegetables

One thing I get complimented a lot on is my preparation of vegetables. Vegetables are good and I like them a lot. Veggies are good and Chrissie didn't used to like them much at all, until she had my stir fry veggies. I'm not going to get into how vegetables are good for you, blah, blah, blah. You can read that lots of other places. I will tell you how to make them quickly and tasty.

The cooking & prep time is about 15 minutes. Ingredients are vegetable(s) of choice, vegetable oil, salt, and maybe water. All you need for equipment is a fry pan with a lid. You don't need a wok. The whole deal with woks are that they conduct heat well and require less fuel/energy to get hot. Woks are popular because they are pretty darn good at what they do. Woks are Asian totally by happenstance. Coincidentally, so am I.

You can stir fry any vegetable. Pick you favorites and throw them in the pan. Some of my favorites are green beans, snap peas, carrots, broccoli, spinach, and cabbage. If you mix and match, take a little time to game plan. Come up with a cooking order for the veggies. For instance, leafy greens don't take as much cooking time as beans or roots, and if you cook them all for the same amount of time they will get wilted. Put them in the pan after the thicker things have had some time to cook. Also, if you have items of different sizes, cut them up so they are close to the same size. This way, they all cook at the same rate and will finish at the same time.

Steps:
1. Prep and wash vegetables.
2. Heat pan on medium-high heat.
3. After the pan gets hot, put in vegetable oil. Let it heat up.
4. When the oil is hot (you can tell because the pan will be "smoking") put in your vegetables.
5. Mix the veggies in the pan. Try and coat the oil over all the vegetables.
6. Add salt to taste.
7. Keep mixing. Do this so that you avoid burning.
8. If necessary, add some water and cover with lid. This will steam the vegetables.
9. Remove veggies and serve.

Times are a little variable. It depends on how many vegetables you have in the pot and how raw you like your veggies. Normally, it takes 5-8 minutes for Steps 5-7 and 1-2 minutes for Step 8. A good indication that you are done is when your veggies start to get char marks on them.

Step 8 is totally optional and to taste. In my experience, it really helps to "finish" the veggies. What steam does is it quickly cooks areas that are still raw and evens everything out. For instance, when I cook broccoli, the outsides are cooked but the centers still taste raw, but if I use Step 8, the steam penetrates the crown and cooks the center. For leafy greens like spinach and swiss chard, I don't take time to remove leaf from stem, so I am faced with an issue with cooking time. Stems take longer than leaves. What I do then is after the leaves are mostly cooked, I finish with steam and the timing works out great. Be really careful with Step 8. It only takes seconds to go from perfectly cooked to over cooked. I am told that stir fry masters can achieve even cooking without the use of steam. I imagine that they take the time to do the little things like make every chunk in your stir fry evenly sized, but for my quick, easy (and inexact) way, I go with steam.

Lastly, practice makes perfect. Every step requires proper execution. Unfortunately, if something goes wrong, you're going to taste it. For me, the difference between properly executed and kind-of-properly-executed is pretty big. Fortunately though, the recipe is so fast, you can really pay attention to what you are doing so even if you screw up, you can keep track of what happened and do better next time.

What I'm looking for in my stir fry veggies are crunchy texture. The color should be bright and shiny. I should taste the actual taste of the veggie, salt, and a little bit of sweet, but I don't like getting any raw veggie taste. If I get droopy or wilty stuff, then it's been cooked too long. If you don't get sweet, then the oil wasn't hot enough when you put the veggies in the pan. Same thing if you don't get a bright and shiny color.

There's really nothing to show in the steps, so here's a look at the finished product:

French cut green beans and sugar snap peas

Monday, May 7, 2012

Coconut Cake: The real deal


It was my dad's birthday recently, so I asked him what he'd like us to make. Admittedly, I expected one of our numerous savory concoctions would be the first thing to come to mind, so I was a little surprised when he asked if we'd be up for making a coconut cake. Not one to back away from a challenge, I decided to go for it and drag Aaron along with me.

After perusing pinterest and the general interwebs for a while, I found this recipe from Saveur. I'd never made anything from there before, but I liked that it called for fresh coconut. We stopped by Whole Foods on the way home and bought all the coconuts they had (since we weren't certain how many it would take to get enough of everything the recipe called for). Later that week we bought the same Whole Foods (which happens to be just a few blocks from our house) out of okra. They're either going to come to love us or hate us.

For what it's worth, the entire coconut stock of Whole Food was 3 coconuts. Which made them slightly difficult to find and I was getting a tad irritated. In the end, we used most all of what we got from 2 of them. The third is still sitting in our fruit basket waiting for us to find a use for it.

The recipe as Saveur states it is as follows:

SERVES 10–12

INGREDIENTS

FOR THE CAKE:
16 tbsp. unsalted butter, softened, plus more for pans
2 1/2 cups cake flour, plus more for pans, sifted
1 tsp. baking soda
1 tsp. kosher salt
1 cup buttermilk
1 tbsp. vanilla extract
2 cups sugar
5 eggs

FOR THE FROSTING:
4 egg whites
1/2 tsp. cream of tartar
2 1/4 cups sugar
1/4 cup light corn syrup
1 tsp. kosher salt
2 tsp. vanilla extract
3/4 cup fresh coconut water
3 cups freshly grated coconut

INSTRUCTIONS

1. Make the cake: Heat oven to 350°. Butter and flour two 9″ cake pans, and set aside. Whisk together flour, baking soda, and salt in a bowl; set aside. Whisk together buttermilk and vanilla in a bowl; set aside. In the bowl of a stand mixer fitted with a paddle, cream butter and sugar on medium-high speed until pale and fluffy, about 3 minutes. Add eggs one at a time, beating well after each addition. On low speed, alternately add dry ingredients in 3 batches and wet ingredients in 2 batches. Increase speed to high, and beat until batter is smooth, about 5 seconds. Divide batter between prepared pans, and smooth top with a rubber spatula; drop pans lightly on a counter to expel large air bubbles. Bake cakes until a toothpick inserted in middle comes out clean, about 35 minutes. Let cakes cool for 20 minutes in pans; invert onto wire racks, and let cool. Using a serrated knife, halve each cake horizontally, producing four layers; set aside.

2. Make the frosting: Place egg whites and cream of tartar in the bowl of a stand mixer fitted with a whisk, and beat on medium-high speed until soft peaks form; turn mixer off. Bring sugar, syrup, salt, and 1/2 cup tap water to a boil in a 2-qt. saucepan over high heat, stirring to dissolve sugar; attach a candy thermometer to side of pan, and cook, without stirring, until thermometer reads 250°, 4–5 minutes. Turn mixer to medium speed, and very slowly drizzle hot syrup into beating egg whites. Add vanilla, and increase speed to high; beat until meringue forms stiff peaks and is slightly warm to the touch, about 3 minutes.

3. To assemble, place one layer on a cake stand, drizzle with 3 tbsp. coconut water, spread with 1 1/2 cups frosting, and sprinkle with 1/2 cup grated coconut; top with another cake, drizzle with 3 tbsp. coconut water, spread with 1 1/2 cups frosting, and sprinkle with 1/2 cup coconut. Place another cake over frosting, drizzle with 3 tbsp. coconut water, spread with 1 1/2 cups frosting, and sprinkle with 12 cup coconut; top with remaining cake and drizzle with remaining coconut water. Cover top and sides with remaining frosting, and cover outside of cake with remaining coconut, pressing it lightly to adhere; chill cake to firm frosting. Serve chilled or at room temperature.


Some notes from actually making it:
Fresh coconut is a beast to work with. Aaron was tasked with the job of cracking the things and getting the flesh out for grating. It took him the same amount of time to do that with 2 coconuts as it took me to do ALL of the other steps in the process.


The cake layers didn't rise as much as some do, so when you cut it into four layers it becomes slightly thin. Not horribly so, but more than I was expecting. The cake itself though is SUPER tasty and a great texture. It will now be one of my go-to cake options.


The cream of tartar in the frosting may well be a very important ingredient. I forgot it and my frosting came out VERY sticky. I'm not sure if that has more to do with the omission of the ingredient or the fact that I don't have a candy thermometer and had to guess at when my syrup hit 250°. Regardless, it was a complete mess to try to spread over the cake. By the third layer I had almost figured it out. Sort of. Good thing the shredded coconut covered everything up. (One plus to the stickyness: the shredded coconut had no problems staying in place.)


All in all, this cake is a good one. The fresh coconut had a lighter flavor which made a coconut hater such as myself not mind it as much as I normally would.  The cake itself is flavored with the coconut water which is also a very nice and delicate touch.  So, if you have a sledgehammer handy and a store that will sell you some coconuts, this recipe is definitely worth a try!

Saturday, April 28, 2012

Cajun Prairie

Last week, we made gumbo and I would like to share it with you. Gumbo's one of those great dishes were everyone seems to have their own recipe. I got mine from James Beard's "American Cookery" and then I promptly changed it. This ones for all you land-lovers out there.

Serves 10. I think this is an understatement. I've had this gumbo for lunch and/or dinner for the last week and am nowhere near finishing it (Chrissie has also contributed to finishing it too).

2.5 pounds of chicken - fryer cut
Flour
4 Tbs butter
4 Tbs oil
Salt & Pepper
2 pounds of okra, cut to 1/4 inch chunks
2 medium onions - sliced
8 more Tbs butter
1/4 pound diced ham
2 cups canned tomatoes
2 quarts stock - chicken or beef
1 bay leaf
1 Tbs chopped parsley
1 pound Andouille sausage
1 Tbs Tabasco sauce
Gumbo file
Boiled rice

First, flour the chicken and sprinkle salt and pepper on it. Then saute the chicken in the 4 Tbs butter and 4 Tbs oil at the top of the recipe. Let it get nicely brown.

In a separate pan, saute the okra in 4 Tbs of butter.

And in yet another pan, saute onions in the last 4 Tbs of butter until brown.

Combine the chicken, sausage, okra, onions, ham, tomatoes, stock, and herbs in a large pot. Cover and simmer for 1.5-2 hours. At the end of the cook time, correct seasoning, sprinkle in the gumbo file. Shred the chicken into the soup and remove the bones. Serve over the boiled rice.


 There, super easy!

A couple notes to help your dish:

 - Gumbo file is the ground leaves from a sassafras tree. It is used to add flavor to a dish and also acts as a thicken for liquid. It is sometimes called "cajun seasoning." Go to a specialty store to find it - we found ours at Whole Foods. Add to taste in your dish.

 - Fresh okra is lots better than canned, but if that's all you can find, the gumbo will still be good.

 - Gumbo is traditionally made with seafood, namely shellfish I believe. "American Cookery" has a couple other recipes for gumbo and they have shrimp, crab meat, and oysters as other types of protein you can stick in. Feel free to mix and match meats into your gumbo. If you use any of the seafood I mentioned above, they do not need to be cooked for the entire 1.5-2 hours. In fact, just add them into the gumbo for the last 5 minutes of cooking.

Happy eating!

Saturday, March 3, 2012

Chili, REAL Chili

I made some chili this week for the first time. It was an amalgamation of recipes and stuff I had picked up. Not much else to say except that it was pretty tasty, and now, I share it with you.

Recipe:
2 Tbsp butter
2 medium onions, sliced (if you want them smaller, dice them)
1 lb ground beef
A 20 ounce can of tomatoes
2 ounces of tomato paste
1/3 cup of beer or ale
1 tsp of salt
A dash of tobasco
1-2 Tbsp of chili powder

Mix & Match ingredients below to your taste. I used them all in these ratios.
1 fresh or dried chili, seeded, stemmed, and minced
1 tsp minced garlic
1/2 tsp ground cumin
1/2 tsp ground oregeno
A dash of cinnamon

Here's a picture of the motley crew:


Things you'll note - no beans. I am told that real chili doesn't have beans in it. I decided to try it this way for my first time. I've had chili both ways and have enjoyed them both. If you want beans, use them. Not being a purist, I won't look down on you. I believe 2 cups of beans equivalates to 1 pound of meat. You'll have to figure the rest out on your own though. In the spirit of full disclosure though, I like the all-meat version better.

The rice cooker in the background is cooking long grain rice. I served the chili over it. For those of you who don't know, rice cookers can cook any type of rice. Each rice cooker is a little different. They all require slightly different amounts of water to get the rice just right. You'll have to experiment with yours to find out how much to put in exactly. My rice cooker is made by Zojirushi and my experience with it, and other Asian brands, has been to use slightly less water than what the rice maker calls for. Oh, another helpful tip - rinse the rice before cooking. That eliminates all the dust in there with it. You can't see it until you add water, then you'll see the water get cloudy. I rinse my rice twice before cooking. It doesn't eliminate all of the dust, but I don't think you ever will. Your rice will taste much better.

Process:

Melt butter in a large pan or pot over medium heat. After it gets hot, saute the onion until it is tender, but not brown. Then add the meat. Break up the meat with a fork. After the meat has browned, add in everything else. Turn the heat to low, cover your pot, and cook at a simmer for an hour. Here's another picture!


After that, it's ready to serve. Easy-peasy! Here's a picture of the final product.


I hope you all enjoy this. If you know of other chili recipes out there, I would love to hear about them and incorporate them into my recipe. Anyway, happy eating!

Saturday, January 28, 2012

Restaurant Re-creation: Pasta with Sundried Tomatoes and Caramelized Onions

Don't judge this book by its cover. It's not the prettiest dish, but it's super tasty.

Since moving to the suburbs, one thing that Aaron and I have struggled with is finding local eateries that satiate our desire for interesting, creative, and well prepared food. We know they're out there, but it takes a fair amount of trial and error to find them. And of course, a little bit more driving.

Recently, we discovered a little one-man establishment in Edmonds called The Eatery Works. It was a rather impromptu night that we ended up having a little free time and so we decided to make it a date night. Happily, chef Jim Taylor did not disappoint. The experience was slightly eclectic - Chef Taylor literally runs the whole show, hosting, waiting the tables, cashiering, and of course cooking. But the atmosphere was charming and the successful way that he pulled it all together was genuinely inspiring. As was the food.

We each had incredible dishes that were superbly innovative and we came home jazzed to attempt to fuse some of his brilliance into our own cooking. (Not to say that this would stop us from going there again. On the contrary, we'll definitely be adding this place to our list of regular haunts.) One of the elements that I'd gotten was a deceptively simple pasta dish in an oil based sauce involving sundried tomatoes and caramelized onions. So, we decided to give that one a shot.

We knew it would be a situation in which we'd have to combine several more basic recipes, so we referenced one of our cooking bibles, How to Cook Everything.

By the way, did all of you know that there's a free App called How to Cook Everything Essentials? It has a lot of the basic information and many of the recipes from the cookbook. And I repeat: it's free. You should download it. It will complete your life.

Or at least your cooking knowledge.

But I digress.

We looked up recipes for caramelized onions (found 2) and oil based pasta sauces. As we suspected, there wasn't a full on recipe (or variation) that specifically dictated what we were aiming for, but it got us far enough to improvise. We mixed the styles of the 2 caramelized onion recipes and used a basic oil and garlic sauce recipe and added our sundried tomatoes to it. Then we just tossed everything together with the pasta.

I have to say, the result was pretty dang good. Not 100% identical to what we had at the restaurant, but still delicious.

One thing that added to our version was the fact that the balsamic vinegar we used for the onions was infused with blackberry. (I'm sure that makes us sound like complete food snobs. But it was the only balsamic we had in the house! And besides, it's incredibly good. It's from The Oil and Vinegar Cellar in Leavenworth. It's especially delicious with Basil Olive Oil. Try it once and you'll be a snob about it too.) It added a unique sweetness to some of the dish that made it different from the restaurant version, but equally appealing. But I'm sure it would be good with regular balsamic.

But you really should try the blackberry infused kind.

Anyway, the recipe went something like this:

Ingredients
Caramelized Onions
One onion, thinly sliced
1 tbsp olive oil
2 tbsp butter
1 cup vegetable stock
2 tbsp sugar
1 tbsp balsamic vinegar

Sauce
1/2 cup extra virgin olive oil
2 tbsp minced garlic
salt
2.5 - 3 tbsp sundried tomatoes

Pasta
1 lb of your favorite thin pasta. Linguini or Spaghetti would work best. We prefer fresh noodles.

Instructions
Thinly slice the onion. Heat the olive oil and butter over medium heat in a saute pan. Once the butter is melted, add the onions and cook until they look mostly brown. Add the sugar and stir it in. Add the vegetable stock and turn the heat up to medium high. Let the liquid reduce off nearly completely (about 5 minutes or so unless you accidentally turn the heat down to medium low for 3 of it like I did. Then it might be closer to 8 minutes.) then add the vinegar. Mix the vinegar in and continue heating for another couple of minutes until the onions get syrupy. Remove them from the heat and set aside.

Begin prepping your pasta.

While the pasta is being prepared, heat 1/2 cup olive oil and the garlic over medium low heat. After approximately 2 minutes, add the sundried tomatoes. Heat until the garlic just starts to turn golden.

One note here: it's helpful to mince the garlic such that you have as much uniformity as possible in the size of your garlic chunks. If some are very small and others are quite large, you may end up over cooking some of it and getting a little bit of bitterness in your dish.

Drain the pasta and pour the noodles into a warmed serving bowl. Toss with the sundried tomato sauce and the caramelized onions. Serve warm with Parmesan cheese.

Sunday, January 22, 2012

Snowed In: Turkey Pot Pie

Chrissie and I have finally emerged from the blizzard that hit our area last week. It was a doozy. It started Tuesday night, got bad Wednesday night, and maintained that level of badness until Saturday. Chrissie and I were holed up in our house the whole time, except for the occasional snow walks with our dogs. We never quite got to the "cabin fever" point, but another day or two may have done us in. All in all though, it was a very pleasant experience for us. It could have easily been the opposite - we knew of several friends who lost power for several days and saw a fair number of people on our street fail to maneuver on the ice and snow.

We had done pretty well on the food front. We had leftovers of a few things that held us over for a couple days, but on Friday, we had run out of pre-made food. In our fridge and pantry were some mismatched staples that needed to be creatively combined in order to put out something that would be palatable. Working in our favor was that we had carrots, celery, onion, potatoes, and some protein (ground turkey). Working against us was that we didn't have any eggs or milk, and only half a stick of butter. Things had the potential to be pretty grim.

I'll admit, I was the one stricken with despair. I blame it on a craving for french toast that had been "inceptioned" into my brain by a sports-radio talk show I listened to the day before the snow hit. Apparently, there had been a tradition in New Jersey to stock up on eggs, milk, and white bread right before a big snow and people would make french toast. I did not stock up on those things and by Friday I was paying the price. I couldn't stop being fixated on what we didn't have and concentrate on what we did have.

Thankfully, Chrissie managed to take the bull by the horns and pull us through dinner that night. She managed to formulate a plan for turkey pot pie, improvising ingredients where we didn't have any. We found this for the base recipe on Tasty Kitchen. We didn't have any turkey gravy, so we substituted it with a can of Cream of Chicken soup. We didn't have enough butter to make the crust, so we used Crisco instead for one half and Krusteaz mix for the other. The end result was delicious and a testament to the power of improvisation.

The top layer of crust broke up as we served it. It held up better in leftover form. No, it doesn't look like much, but it'll make point five past light speed.

Recipe - Snowy Day Turkey Pot Pie
Adapted from Zina via Tasty Kitchen


Ingredients
  • 2 recipes worth of pie crust
  • 4 Tablespoons Butter, Divided
  • 1 whole Carrot, Sliced Or Cubed
  • 1 stalk Celery, Chopped
  • 1 whole Small Onion, Diced
  • 2 cloves Garlic, Minced
  • 2 Tablespoons Fresh Thyme Leaves, Chopped or a dash of dried thyme
  • ½ pounds ground turkey, browned with salt and papper
  • ¼ cups Flour
  • 1 can cream of chicken soup
  • 2 cups of chicken broth
  • 2 whole Small Potatoes, Peeled And Cubed
  • ½ cups Frozen Green Peas

Directions


Preheat oven to 350 degrees F.

Pre-prepare your pie crusts. Line your baking dish with one, refrigerate the other until it's time to put the pie together.

Heat 2 Tablespoons of the butter in a large, deep skillet and saute the carrots, celery and onion until until tender. Add the garlic and saute until fragrant, but not brown.

Add the thyme and turkey and add salt and pepper as desired. Cook several minutes until heated through.

Add the remaining 2 Tablespoons of butter and the flour. Cook, stirring frequently, for a couple of minutes, being careful not to burn.

Stir in the cream of chicken soup and the chicken broth and heat to a simmer. Add the potatoes and cook until tender, about 30 minutes.

Remove from heat and add the frozen peas. Stir to combine.

Pour turkey mixture into the prepared pie crust and cover with the other pie crust. Slit top in several places to let steam escape.

Bake 35 to 40 minutes, depending on your oven, until top is golden brown. Remove pie from oven and let stand a few minutes before serving.
 

Sunday, November 20, 2011

Snickerdoodle Muffins


Many months ago I spotted a recipe on the web for snickerdoodle muffins and I got very excited. They looked positively delicious. Snickerdoodles rank high in my love of all things cookie, so transforming them into something that is socially acceptable to eat for breakfast sounded positively ingenious. I was so excited that I forgot to bookmark the page.

My only memory of the recipe was that it used cinnamon chips so I figured I would track those down before scouring google to find the recipe again. It took a fairly good while to find the chips, I guess they're a relatively seasonal offering. (note to self: stock up!) When I finally tracked them down, I came home happily with visions of sugary goodness in my head.

But I couldn't find the recipe. I found many similar recipes for similar muffins, but the version that had piqued my excitement months ago was apparently lost in the depths of the interwebs. My love of snickerdoodle prevailed, however, and I decided to come up with a recipe of my own. They turned out wonderfully, a cinnamony-sugary concoction that grazed the line between snickerdoodle and coffee cake. The cinnamon chips surprised me by melting into the muffin batter when they were baked, adding dots of sweetness rather than crunch. While originally I'd been hoping for the texture of the chip, I loved the way it turned out. My breakfast for the week was saved and yours can be too:


Snickerdoodle Muffins

Ingredients
1 3/4 cups all purpose flour
1/2 cup sugar
2 teaspoons baking powder
1/2 teaspoon salt
1 egg, beaten
1 cup milk*
1/4 cup vegetable oil
1 pckg cinnamon chips
Cinnamon topping

*I ran low on milk and ended up using about half milk, half heavy cream. Cream can do no harm, right? That's what I thought.

Cinnamon Topping
1 cup sugar
2 teaspoons ground cinnamon

Directions:
Preheat the oven to 375 degrees. Grease your muffin pan. In a good sized bowl, combine your dry ingredients (flour, sugar, baking powder, and salt). In another bowl, combine your egg, milk, and vegetable oil. Add the wet ingredients into the dry and mix until just moistened. Stir in the cinnamon chips.

Fill the muffin cups about 2/3 full then dust lightly with cinnamon topping. Bake 25 to 30 minutes or until the muffins look golden brown.

Makes 12 muffins

Sunday, September 18, 2011

Easy Blueberry Jam

Aaron grew up on a blueberry farm and consequently, loves them. Me, not so much. But, strangely enough, I love picking them. Maybe it's something about growing up in a situation where berry picking of any kind is an adventure that you only get to do a couple times a year and it's so exciting that it's worth inviting friends along. At any rate, I'm more than happy to help him harvest them and make fun concoctions, but I don't really do much of the eating myself.

So this year, we went up to his dad's farm in mid-August to have our fun berry picking. Problem was, there were no berries to pick. They were all green. Green is not blue. We were definitely there for BLUEberries. So, we had a nice visit, but came home empty handed.

Happily, Aaron's dad drops by the city once in a while and a couple weeks later brought us a couple pounds of berries that he'd picked himself. So, while I didn't get to have my fun wandering about the fields running like a headless chicken from passing honeybees, we did get some blueberries. Since we had more than Aaron could eat on his own raw, we decided to make some blueberry jam from a recipe we'd spotted several weeks earlier.

Yes, it's Mark Bittman again. I didn't mean to find his blueberry jam recipe. I just stumbled across this one and liked it. I didn't even know it was him until after I'd already decided to put it on our "to make" list. Honest!

I'm told it turned out quite well. The primary downside to this recipe is that it doesn't actually preserve the berries - you still have to eat the jam within a week or so. We ended up giving some to a colleague of mine who regularly shares his veggies and jams with us. The plus side is it's quite quick and easy to make and it's much more spreadable on toast and sandwiches than raw blueberries.


Fast Blueberry Jam

Yield About 1 to 1 1/4 cups of jam
Time 20 to 30 minutes
Mark Bittman


Ingredients
  • 1 pound blueberries, picked over
  • 1 3-inch cinnamon stick
  • 1/2 cup sugar, or to taste.
Method
  • 1. Put blueberries in a small-to-medium saucepan, to a depth of a couple of inches, over medium heat. After a minute of so, add cinnamon and sugar, and bring to a boil.
  • 2. Adjust heat so mixture bubbles steadily. If it looks too soupy, use a higher heat to reduce it; if there is not much liquid, use lower heat to avoid burning. Cook, stirring occasionally, until mixture is liquid but thick, about 15 to 20 minutes.
  • 3. Cool and refrigerate mixture; it will thicken as it cools. Store, refrigerated, for up to a week. Remove cinnamon stick before serving.

Monday, August 29, 2011

Pasta with Grilled Tomato and Sage Sauce


A couple of weeks ago I saw this recipe on Foodista. I was super excited and had planned to try it that same weekend. We even bought tomatoes. But time got away from us and we ended up using the tomatoes for something else. So, while we were on staycation last week and were wandering around Pike Place Market, we found a vendor from Yakima selling some decent looking fare and picked up some new tomatoes. We coupled those with sage from our garden, and an incredible blackberry infused balsamic vinegar from Leavenworth. The result was excellent.

Grilling the tomatoes adds a nice touch of slight smokey or charred flavor to an overall very simple dish. The blackberry vinegar we chose to use didn't seem to do much to the flavor (though I can't say for sure since we don't have a basis for comparison) but it did lend a nice aroma to the plate.

In the future, we may add more sage. We ended up having 2 pounds of tomatoes instead of the 1.5 that's called for and we adjusted the sage accordingly, but the flavor still seemed a little lost. I forgot to change the ratios of the oil and vinegar, but neither of those seemed lacking.

We also agreed that the sauce (while very good in its own right) could be interestingly enhanced by adding some sauteed garlic or onion, or by toying with other herbs. In it's basic state, it may also make a good pizza sauce. Hopefully we'll get enough nice days during the rest of the summer that we can test some of our theories out!

Sunday, August 14, 2011

Grilled Peaches


It's definitely the time of year for grilling (though it's been awfully hard to tell around here). While typical barbeque staples like burgers, chicken, corn, and peppers are all well and good, it's fun to mix it up a little with things like strawberry shortcake kebabs and of course, some grilled peaches.

These are incredibly straight forward to make, so I'll let you all just bask in their simplicity. Simple food = good food.

Grilled Peaches

Cut your peaches into approximately 8 slices and remove the pit.
Coat the outside of your peach slices with a neutral oil such as grapeseed or canola oil.
Lay each slice on the grill and cook until it begins to get grill marks.
Remove from heat and serve. They're great plain, or with a little fresh whipped cream.

Enjoy!

Sunday, August 7, 2011

Locavore Sunday

In honor of our own slightly watered down version of the Locavore Challenge, we spent the day today making sure that everything we ate contained locally sourced ingredients.  We made it slightly easier on ourselves by waking up too late for breakfast, and going to Farmer's Market to pick up our ingredients for dinner. While at the Farmer's market, we had some lunch:


We've eaten at this particular stand many times before and have had discussions with them about the fact that all of their ingredients each day come from the market itself. Good stuff.

For dinner, we wandered around the market for a while to get inspiration. When we noticed that tomatoes have finally started showing up, we decided we should make a variation of a pasta caprese type dish that my grandmother used to make. We didn't quite stick to the recipe that my dad gave us, but it still came out quite well:


Literally everything in this dish was locally sourced:

Flour for pasta: Emmer flour from Winthrop, WA
Eggs for pasta: Aaron's Grandpa's chicken farm in Mt. Vernon, WA
Tomatoes & basil: from a local farm in Yakima, WA
Mozzarella: a dairy in Bow, WA
Olive oil: Leavenworth, WA
Garlic: our yard

The pasta was a little more gritty than it would be with more refined flour, but it still tasted good and the flavor blended with the rest of the ingredients well. The olive oil we had on hand from Leavenworth is infused with basil, which was slightly overkill and I prefer using regular olive oil. On the whole, I think our take on the family tradition is a good one. The recipe is as follows:

Pasta Caprese

4 tomatoes, peeled and cut into chunks, saving the seeds
1/2 lbs basil counting everything, or 2 cups of leaves torn into medium sized pieces
4 peeled cloves of garlic
1/4 lbs fresh mozzarella, shredded
approx. 1/2 cup olive oil
1 recipe of your favorite pasta

Mix the tomatoes, basil, garlic, olive oil, and mozzarella and let chill for approximately 1 hour in the fridge. Serve over the pasta.

Try not to eat it all, because it's even better on day 2!

Monday, August 1, 2011

Roast Chicken

We made roast chicken for dinner on Sunday night. Making it isn't anything new, but I have never been totally satisfied with the results. It has been a while since I last made roast chicken. I made a point to do it tonight because I wanted to try some new things out. I've sort of been on a chicken quest lately. It's a search to find really yummy tasting chicken. I think I took a step in the right direction today.

The recipe is a combination of what I do with chicken normally and the Roast Chicken recipe from Julia Child's "Mastering the Art of French Cooking."

Ingredients:
3 lb. chicken
6 tablespoons of softened butter divided up equally into 3 parts
1 small carrot & 1 small onion - sliced
1 Tb good cooking oil
3/4 tsp salt
1/2 Tb green onion - minced
1 cup chicken stock
1 clove of garlic
1 sprig of rosemary

First off, picking a good chicken was very important. Ideally, you want a relatively young chicken (8 months old or less) who has lived a happy, fulfilling chicken life. This would lead me to getting my chicken from the farmer's market, but we didn't have time to do that today, so we got it from the PCC market. It was 3.75 pounds and claimed to be free range. After having eaten it, I could attest to it being superior to a normal supermarket chicken. I'm kind of done with supermarket chicken now. I've had life changing meals made from beef, pork, crab, fish, and a bunch of other things, but never with chicken. It's something that I've only noticed in the last couple of years, but chicken is really bland. There's something wrong with that.

Aside, if everyone eats bland chicken, can one actually say that it tastes like chicken? Maybe that's why everything tastes like chicken, it's the non-descript meat that can conform into any flavor profile. Maybe, it's the other way around. Maybe, chicken tastes like everything else.

Julia tells you to season the chicken before putting it in the oven by sticking 1/3 of the salt and 1/6 of the butter into the cavity of the chicken and another 1/6 of the butter smeared over the outside of the chicken. I did that and also added in a sprig of rosemary to the cavity and rubbing the clove of garlic (which I cut in half) over the entire outside. The garlic and rosemary I owe to Laila Storch and Marcel Tabuteau. you won't find Storch or Tabuteau in any food magazines or shows - they are/were professional musicians. You don't have to be a professional chef to have something meaningful to add. That's what I think anyway.

Julia also tells you to truss the chicken, but I didn't. In fact I've never done that, but I'm sure that I will one day as my quest for the perfect chicken will one day dictate.

Next, you put the chicken in your roasting pan surrounded by the carrots and onions and brown the left, right, and breast side of it under 425 degree heat. After the sides are browned (about 25 minutes total), the oven goes down to 350 degrees for the rest of the time (another hour).

While that's happening, mix 1/3 of the butter together with your cooking oil to make a basting solution and baste it onto the top of the bird every 10 minutes.

When the chicken is done cooking, it gets set aside to a warm platter to rest (makes the meat more juicy). While it's resting you make the sauce (the super yummy part). Spoon out all buy 2 Tsp of the chicken juice from the pan. I removed the burned vegetables from the pan. Add green onions and cook slowly for a minute, then add the chicken stock and reduce at hight heat until theres about 1/2 cup left of stuff. I mashed the leftover veggies as much as I could. Put sauce into a bowl and put the last 1/3 of the butter into it.

And then... eat!


I'm always pleasantly surprised by the sauces I make from the MtAoFC cookbook. Whenever I make them I am super skeptical all the way until the first bite. The process is full of second-guessing and overthinking. The last thought I have before Chrissie and I spoon some onto our plates is always, "God, I hope this turned out alright." Then, you put it in your mouth and bliss. If there's anything I can add to the cookbook, it would be a comment saying, "Don't skimp on the sauce, seriously!" If you say, make a meat dish and decide to skip the deglazing step at the end, you're missing out on a truly delightful experience.

Anyway, chicken! The quest continues.

Monday, July 25, 2011

Ricotta for our Ravioli

I got it in my head last week that I wanted to make ravioli from the ground up. If I could have grown and ground the wheat for the pasta, I probably would have. But that's not in the cards at this point, and I'm not nearly that patient anyway.

Most of the steps for this process were things we'd done before. We make fresh pasta regularly ('cause it's just so dang tasty!) and we've made our own tomato sauce before as well. So it came down to the filling. We were just aiming for a basic cheese ravioli, so there's not much to it, which meant we needed to make our own ricotta. This recipe from Serious Eats caught my attention right from the google search. Fresh ricotta in 5 minutes or less? Sign me up!

Conveniently, this cook advocates the use of a microwave to heat the milk to the desired temperature. When we made cheddar cheese a few months ago (post to come someday in the future) heating the milk felt a tad bit painstaking. But then, I may have been taking it a tad too seriously as well. Maybe.

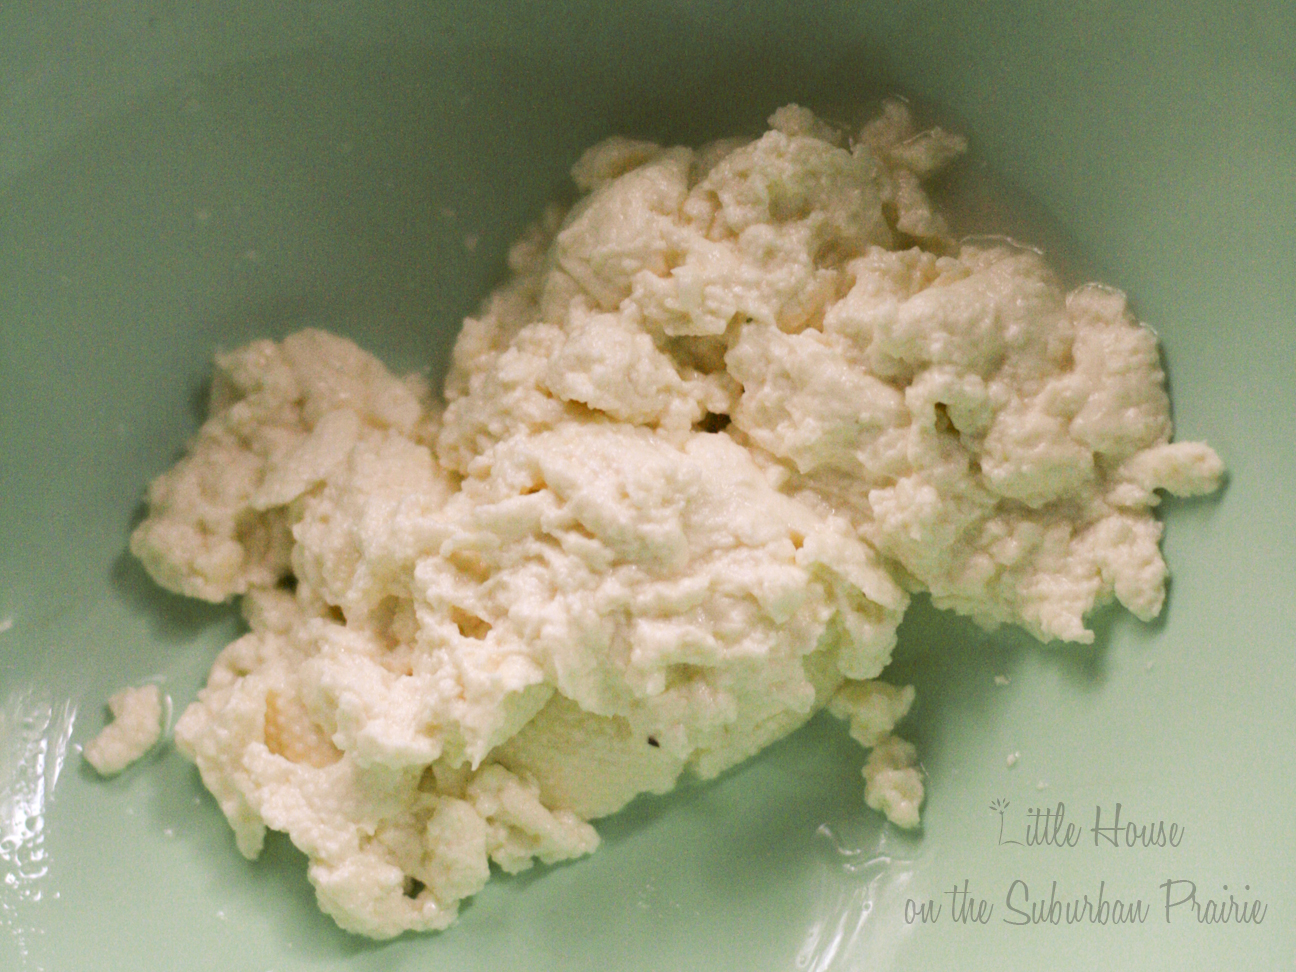
In process, we discovered that making 1/2 cup of ricotta in 5 minutes or less is probably possible, but making the 2 cups that we wanted for our recipe of ravioli wasn't going to be quite so streamlined. We made our ricotta in 2 batches (due to the size of our bowl and microwave) and still the milk took approximately 12-14 minutes to reach 165 degrees, even with our microwave set to high. Apparently twice the milk = triple the time. It's still a much more immediately gratifying process however than it's cheddar cheese cousin, which is aging for 6 months in our pantry (4 months down!). So, it took about half an hour in the end to reach our quota of 2 cups of fresh ricotta. But it was well worth it.

Fresh Cheese!
We make pasta often enough that we have the process pretty speedy at this point. Rolling out the dough only took about 20 minutes so while I did that, Aaron went ahead and mixed our fresh ricotta with the rest of the ingredients for our ravioli filling: parsley, parmesan, salt, pepper, and nutmeg.


For my taste, this recipe uses a little too much parsley. Next time, we may omit it all together and use oregano instead. But we're not entirely decided yet. And we had plenty of parsley growing in our garden, so for this round, it made perfect sense.

Once the pasta was rolled (note, it should be quite thin - almost translucent) and the filling mixed, it was time to construct our food:


Once they were complete, we boiled them for just a couple of minutes and topped them with our freshly made tomato sauce.

The finished product:


Verdict: the fresh ricotta really did make a difference. The raviolis were creamier and less rubbery than the ones we've made with ricotta from the store. The other pro is that we can make exactly as much as we need and not worry about needing to find additional uses for sub-par ricotta. I'm sure we'll do it again sometime.  You should, too!

Serious Eats Recipe for Ricotta

Cheese Ravioli
Originally from Mark Bittman

Ingredients
2 cups fresh ricotta
1/2 cup freshly grated parmesan
1 cup minced parsley
1/2 teaspoon nutmeg
Salt and Pepper to taste


Combine ingredients and fill freshly made pasta dough. Boil for 2-3 minutes until tender. Serve with your favorite sauce.

Monday, July 18, 2011

Our Perfect Pizza

There have been a few evenings over the last couple of months that I've gotten completely insatiable cravings for pizza, but we haven't had any of the typical ingredients, nor the desire to order a greasy heap of pepperoni from any of the 375289 chains in the area. No, I'm not actually a complete pizza snob... yet. Sometimes I still eat that giant pool of grease with reckless abandon and enjoy every second of it. But on the nights in question, I distinctly wanted something homemade.

Several years ago I went to this pizzaria in Wisconsin. I've also been to Japan. Somewhere in the amalgamation of those 2 places in my brain, I've grown pretty convinced that you can put anything on a pizza.

So, we rifled through our pantry and fridge and found the following:

olive oil
fresh rosemary
goat cheese
pancetta
pink lady apples

Pretty good for a kitchen devoid of tomato sauce. We also had enough staples to make a basic pizza dough, so we went for it.

I should stop here and admit that I have a bit of a crush on pancetta. Seriously. It's not quite as salty as proscuitto, but not as heavy as bacon. It has a big flavor for a small quantity. And it has a very high-class-culinary sounding name. Pancetta is all win, all the time.

But I digress. Here's the pizza pre-oven:


Just looking at it makes me want to make it all over again. Good thing I live in a state with lots of Apples.

Here's the finished product (which is a bit messier looking due to some user error involving the pizza peel):


And of course, the concise recipe since I know you're all going to want to make this yourselves tonight.

Seriously. Do it.

Apple - Pancetta Pizza

Ingredients

1 recipe of your favorite pizza crust
1 tbsp olive oil
1 tbsp fresh, chopped rosemary or to taste
1 cup goat cheese (feta also works well)
1/2 apple (pink lady is our preferred, but anything somewhat tart will do)
3-4 slices pancetta

Instructions:

Preheat your oven as high as it will go. Ours only gets to 525 degrees, which is pretty standard, but if you can get hotter, go for it. If you have a pizza stone, make sure that it's in the oven while it preheats.

Prep the pizza dough. Layer the ingredients beginning with the olive oil.

Once your oven is preheated, place the pizza directly on the pizza stone if you have one, or you may use a baking sheet.  Cook until the crust is just beginning to be golden brown and/or until the pancetta starts to brown at the edges.

Cut and serve!

Sunday, July 10, 2011

Bringing the Stadium Home

We haven't had a chance to do much shopping for groceries lately, but that didn't stop us today from creating a little piece of the stadium atmosphere at home while we watched the Seattle Sounders take on the Portland Timbers in soccer.  (GO SOUNDERS!)

I'm a sucker for giant soft pretzels and it had been a really long time since I'd attempted making any, so we decided to make that our stadium food of choice.  I found a nice looking recipe for Soft-Garlic Rosemary Prezels with White Cheddar Cheese Sauce from yumology on Tasty Kitchen to use as our foundation. In the end, we struck pretty true to it for the pretzels themselves and branched away primarily for the cheese sauce.

As it turns out, if you're on a timeline, I'd suggest having a pair of people working and to start the cheese sauce as soon as the first person starts rolling out the pretzels. It takes a fairly good while to get the rue bubbling and ready for the addition of the cheese.

Nonetheless, the results were excellent. The main modifications we made in the cheese sauce were to use medium yellow cheddar in place of the sharp white, 2% milk, and we omitted the cayenne. Most of these changes were simply made based on what was available to us. We chose to leave out the cayenne pepper because we wanted to stick with something pretty mild for today, since the game was destined to be spicy enough. ;)


Recipe - Garlic and Rosemary Soft Pretzels with Cheese Sauce
Adapted from yumology's adaptation from Cooking Light

Ingredients
  • FOR PRETZELS:
  • 2-¼ teaspoons Dry Yeast
  • 1-½ teaspoon Brown Sugar
  • 1 cup Warm Water
  • 3-¼ cups All Purpose Flour, divided use
  • 1 teaspoon Salt
  • 1 clove Garlic (large), Minced
  • 2 teaspoons Fresh Rosemary, Finely Chopped
  • ½ teaspoons Pepper
  • 6 cups Water
  • 1 teaspoon Baking Soda
  • 1 teaspoon Olive Oil
  • 1 whole Egg
  • Kosher Salt Or Sea Salt (for Topping)
  • Cooking Spray
_____
  • FOR CHEESE SAUCE:
  • 1 Tablespoon Butter
  • 1 Tablespoon Flour
  • 1 cup 2% Milk
  • ¾ teaspoons Salt
  • ½ teaspoons Pepper
  • 1 cup grated Medium Cheddar Cheese


Preparation Instructions 


1. Dissolve yeast and sugar in warm water in a large bowl, and let stand for 5 minutes.
2. Add 3 cups flour and 1 teaspoon salt to yeast mixture; stir until a soft dough forms. Mix in garlic, pepper and rosemary.
3. Turn dough out on to a lightly floured surface; knead until smooth and elastic (about 8 minutes). Add enough of remaining flour, 1 tablespoon at a time, to prevent dough from sticking to hands (dough will feel slightly sticky). Place dough in a large bowl coated with cooking spray, turning to coat top. Cover and let rise in a warm place (85°), free from drafts, 40 minutes or until doubled in size. (Gently press two fingers into dough. If indentation remains, the dough has risen enough.) Punch dough down; cover and let rest 5 minutes.
4. Preheat oven to 425°.
5. Divide dough into 8 equal portions. Working with one portion at a time (cover remaining dough to prevent drying), roll each part into an 18-inch-long rope with tapered ends. Cross one end of rope over the other to form a circle, leaving about 4 inches at end of each rope. Twist the rope at the base of the circle. Fold the ends over the circle and into a traditional pretzel shape, pinching gently to seal. Place pretzels on a board or baking sheet. Cover and let rise 10 minutes (pretzels will rise only slightly).
6. Combine 6 cups water and baking soda in a pot. Bring to a boil; reduce heat, and simmer. Gently lower 1 pretzel into simmering water mixture; cook 15 seconds. Turn pretzel with a slotted spatula; cook an additional 15 seconds. Transfer pretzel to a prepared baking sheet coated with cooking spray. Repeat procedure with remaining pretzels. Combine olive oil and egg in a small bowl, stirring with a fork until smooth. Brush a thin layer of egg mixture over pretzels; sprinkle with kosher or sea salt.
7. Bake at 425° for 17 minutes or until pretzels are deep golden brown. Transfer to a wire rack to cool.
—-
For White Cheddar Cheese Sauce
1. In a small sauce pot, heat the butter on medium-low. When melted, whisk in the flour until combined. Add the milk and stir constantly until mixture thickens and begins to bubble slightly. Next, mix in salt and pepper.
2. Add the cheese and stir/whisk on medium heat until melted into the sauce. Cook for about 1 minute or until sauce begins to simmer gently. Remove from heat and serve.

Wednesday, July 6, 2011

Eating Red, White, and Blue

As you may have guessed, Aaron and I decided to have a little fun with our food on Independence Day so we tried to make sure as much as possible that day that what we were eating was red, white, and/or blue. We wanted to stay away from the stereotypical strawberry/blueberry flag cake, so we had to get a little creative. There just aren't many blue foods out there!  Here's what we came up with:


Blue chips, Red Salsa, Sour Cream

We didn't make much of this one, though I'm sure we could have. We made the salsa from scratch, but we weren't able to get to the farmer's market and while the tomatoes at PCC were decent, the season for them around here is really just beginning. The recipe for our mild red salsa:

2 heirloom or vine tomatoes (peeled, seeded, and diced)
2-3 small roma tomatoes (peeled, seeded, and diced)
3/4 of a red pepper (cored and diced)
7-8 stems of cilantro (chopped)
A dash of lemon juice
Salt and pepper to taste


Red, White, and Blue Rosemary Potatoes

I was originally intending to make these crispier but I boiled them a little too long and used more potatoes than my pan could handle. They turned out quite nicely anyway, so here's what we did:

Boil 3 potatoes of each variety (small varieties work best, we used Yukon Golds, Baby Reds, and Peruvian Purple) cut into approximately 1 - 1.5 inch cubes for about 10 minutes. Or until they're slightly less tender than they look above.

Heat 1/4 cup olive oil in a pan over medium-high heat when your potatoes are about 3 minutes away from being finished boiling.

When the potatoes are tender in the water, drain them. If the oil is sufficiently heated, add the potatoes to the oil.

If you're like me, your potatoes won't all be able to reach the heat source, so you'll need to periodically stir them around to ensure that all the potatoes get some chance at being cooked.  Don't stir them too much, or none of them will get crispy on the outside at all.

Once the potatoes look tasty, add about 2 teaspoons of fresh, chopped rosemary (1 teaspoon dried) and salt and pepper to taste. Cook for about 5 more minutes, then serve straight from the pan.


Grilled Strawberry Shortcake Kebabs

We found this recipe originally in Sunset Magazine, but made some adaptations for our taste. Sunset suggested using Angel Food cake, but neither of us prefer that so we made a fresh pound cake that morning. For the topping, Sunset also suggested using a combination of crème fraîche, whipped cream, brown sugar, and lemon zest, but we wanted something a little more simple, so we stuck with homemade whipped cream. All in all, we really enjoyed what we came up with, so here is our adaptation.

2 Slices of Pound Cake
8 Strawberries
2 Tablespoons Strawberry Jam
1/2 cup freshly made whipped cream


Heat the jam in the microwave just long enough so that it starts bubbling and coat your hulled strawberries with it. (We happened to have strawberry jam that was just made a week ago by my co-worker. I think this was a major plus.) Cut the pound cake slices into cubes. Double up the skewers for stability and thread approximately 4 strawberries and 3 pieces of pound cake onto each one. (As you can see, we had varying sizes of strawberry.) Place the skewers onto a relatively low-heat grill (approximately 350 degrees) for about 2 minutes per side. We tried to cook all four sides rather than just the 2 suggested by Sunset, but it might be different with Angel Food Cake. When the cake (and hopefully the strawberries) are lightly grilled on all sides, take them off and serve with the whipped cream!


We realize that our dessert did not have any blue. We had intended to make some blueberry fools to remedy that situation, but we were too full, too tired, and ready to watch some fireworks. So, the blue dessert will have to be saved for another day.