Thursday, August 4, 2011

Gardening to Save Money

Aaron and I are guest bloggers today over on my friend Erin's blog, Coupon Newbie. Erin is a crazy-impressive bargain shopper, especially when it comes to local stores like Rite-Aid. She also posts tips on finding good deals on organic produce from local farm stands as well as Daily Deals for CSA baskets and the like.

To stick with her theme, Aaron and I posted about some of the money-saving tips we've discovered so far in our victory garden. It wasn't hard, since growing our food has definitely proven to be an economic advantage, albiet a small one sometimes.

For those intrepid followers though who want to know more, here are a few additional tips to compliment our guest blog:
  • Lettuce doesn't need to be harvested all at once. You can harvest only the leaves you need and leave the rest of the plant in the ground and it will continue regrowing all season long. I'm given to understand that if you harvest off the same plant more than three times or so that it will start to get bitter, but we haven't had that issue yet.
  • While space is advantageous, not much is necessary to yield a decent crop of summer produce and herbs if you plan wisely.
  • Don't forget the scapes of your garlic! Fun edible treats can be made with those too.
Down the road when our composting is more established and some of our perennial plants are more mature, I forsee that we will garner even bigger savings from our home-grown goodies. For now we're happy to be eating at least a few meals here and there that are healthier, tastier, and cheaper all on one plate.

Tuesday, August 2, 2011

Eat Local Challenge

Today, I stumbled across this blog which is sponsoring an eat-local challenge for the month of August. Even though our growing season seems to be happening awfully late around here, August seems like as good a time as any to give this a go.

Eating local around the NW doesn't seem like it should be too hard, but I'm betting we'll have some struggles. I try to pay attention to where things come from, but haven't honestly ever put a whole lot of effort into sourcing my food. I'm sure I'll be relying heavily on the Locavore's Manifesto for situations where I'm not sure if I can pull it off.

We're starting a little late and I know we weren't perfect for the first couple of days, but I think my goal will be slightly lower key than the challenge suggests. Since so much could be accomplished if everyone ate completely local for just one meal a week, I will attempt to be absolutely 100% local for one day each week of this month. And I'll come as close as I can the rest of the time.

So what about you? Will anyone out there join us in some permutation of this challenge this month?

Monday, August 1, 2011

Roast Chicken

We made roast chicken for dinner on Sunday night. Making it isn't anything new, but I have never been totally satisfied with the results. It has been a while since I last made roast chicken. I made a point to do it tonight because I wanted to try some new things out. I've sort of been on a chicken quest lately. It's a search to find really yummy tasting chicken. I think I took a step in the right direction today.

The recipe is a combination of what I do with chicken normally and the Roast Chicken recipe from Julia Child's "Mastering the Art of French Cooking."

Ingredients:
3 lb. chicken
6 tablespoons of softened butter divided up equally into 3 parts
1 small carrot & 1 small onion - sliced
1 Tb good cooking oil
3/4 tsp salt
1/2 Tb green onion - minced
1 cup chicken stock
1 clove of garlic
1 sprig of rosemary

First off, picking a good chicken was very important. Ideally, you want a relatively young chicken (8 months old or less) who has lived a happy, fulfilling chicken life. This would lead me to getting my chicken from the farmer's market, but we didn't have time to do that today, so we got it from the PCC market. It was 3.75 pounds and claimed to be free range. After having eaten it, I could attest to it being superior to a normal supermarket chicken. I'm kind of done with supermarket chicken now. I've had life changing meals made from beef, pork, crab, fish, and a bunch of other things, but never with chicken. It's something that I've only noticed in the last couple of years, but chicken is really bland. There's something wrong with that.

Aside, if everyone eats bland chicken, can one actually say that it tastes like chicken? Maybe that's why everything tastes like chicken, it's the non-descript meat that can conform into any flavor profile. Maybe, it's the other way around. Maybe, chicken tastes like everything else.

Julia tells you to season the chicken before putting it in the oven by sticking 1/3 of the salt and 1/6 of the butter into the cavity of the chicken and another 1/6 of the butter smeared over the outside of the chicken. I did that and also added in a sprig of rosemary to the cavity and rubbing the clove of garlic (which I cut in half) over the entire outside. The garlic and rosemary I owe to Laila Storch and Marcel Tabuteau. you won't find Storch or Tabuteau in any food magazines or shows - they are/were professional musicians. You don't have to be a professional chef to have something meaningful to add. That's what I think anyway.

Julia also tells you to truss the chicken, but I didn't. In fact I've never done that, but I'm sure that I will one day as my quest for the perfect chicken will one day dictate.

Next, you put the chicken in your roasting pan surrounded by the carrots and onions and brown the left, right, and breast side of it under 425 degree heat. After the sides are browned (about 25 minutes total), the oven goes down to 350 degrees for the rest of the time (another hour).

While that's happening, mix 1/3 of the butter together with your cooking oil to make a basting solution and baste it onto the top of the bird every 10 minutes.

When the chicken is done cooking, it gets set aside to a warm platter to rest (makes the meat more juicy). While it's resting you make the sauce (the super yummy part). Spoon out all buy 2 Tsp of the chicken juice from the pan. I removed the burned vegetables from the pan. Add green onions and cook slowly for a minute, then add the chicken stock and reduce at hight heat until theres about 1/2 cup left of stuff. I mashed the leftover veggies as much as I could. Put sauce into a bowl and put the last 1/3 of the butter into it.

And then... eat!


I'm always pleasantly surprised by the sauces I make from the MtAoFC cookbook. Whenever I make them I am super skeptical all the way until the first bite. The process is full of second-guessing and overthinking. The last thought I have before Chrissie and I spoon some onto our plates is always, "God, I hope this turned out alright." Then, you put it in your mouth and bliss. If there's anything I can add to the cookbook, it would be a comment saying, "Don't skimp on the sauce, seriously!" If you say, make a meat dish and decide to skip the deglazing step at the end, you're missing out on a truly delightful experience.

Anyway, chicken! The quest continues.

Thursday, July 28, 2011

Dear Vampires,

Please stay a healthy distance away from our house. Otherwise, I'll garlickify you.

Chrissie and I harvested our garlic this week. All in all, I think that it turned out to be a good crop. When we first planted the garlic, I was a little worried because my dad told us that garlic didn't grow well up here because they didn't get enough sun. Sure, we didn't get huge heads of garlic like you see at the super market, but we got something. I like to think they look like the stuff we would find at farmer's market. They will sit in our pantry for a few weeks to dry and then we will use them.

We are already talking about how we can do better next year. First, we are going to try spacing the cloves farther apart. Second, we are going to look specifically for "hard neck" variety garlic to plant. Hard neck garlics grow better in more northerly lattitudes. I don't know what kind we got this year. I picked the ones we got because they were a German variety and figured that our climates would be similar enough for the garlic to do well.


A couple of other things to note this week for me. I went on a vegetarian trip on Tuesday and Wednesday. Totally unintentionally, but that only makes me prouder of myself. However, I think I can only handle a couple days there, tops. Today, I ate fried chicken for lunch and more chicken for dinner. I'm trying to get Chrissie on board for roasting a chicken for dinner over the weekend. Does being a vegetarian count for a couple days if I just make up for it the day I go back?

Also, thanks a bunch to the guys at Morgan's on Crown Hill. We had a leaky outdoor faucet and the normal hardware stores didn't have the washer I needed (Lowe's and Home Depot). Granted, I have one of those complicated frost-proof faucets, but it shouldn't be hard to find a bloody washer. Anyway, the guys at Morgan's were really nice and spent half-an-hour with me figuring it out (sometimes it's hard to find a bloody washer). That's the kind of thing I really appreciate, so I think I'll be going there in the future for stuff.

Monday, July 25, 2011

Ricotta for our Ravioli

I got it in my head last week that I wanted to make ravioli from the ground up. If I could have grown and ground the wheat for the pasta, I probably would have. But that's not in the cards at this point, and I'm not nearly that patient anyway.

Most of the steps for this process were things we'd done before. We make fresh pasta regularly ('cause it's just so dang tasty!) and we've made our own tomato sauce before as well. So it came down to the filling. We were just aiming for a basic cheese ravioli, so there's not much to it, which meant we needed to make our own ricotta. This recipe from Serious Eats caught my attention right from the google search. Fresh ricotta in 5 minutes or less? Sign me up!

Conveniently, this cook advocates the use of a microwave to heat the milk to the desired temperature. When we made cheddar cheese a few months ago (post to come someday in the future) heating the milk felt a tad bit painstaking. But then, I may have been taking it a tad too seriously as well. Maybe.

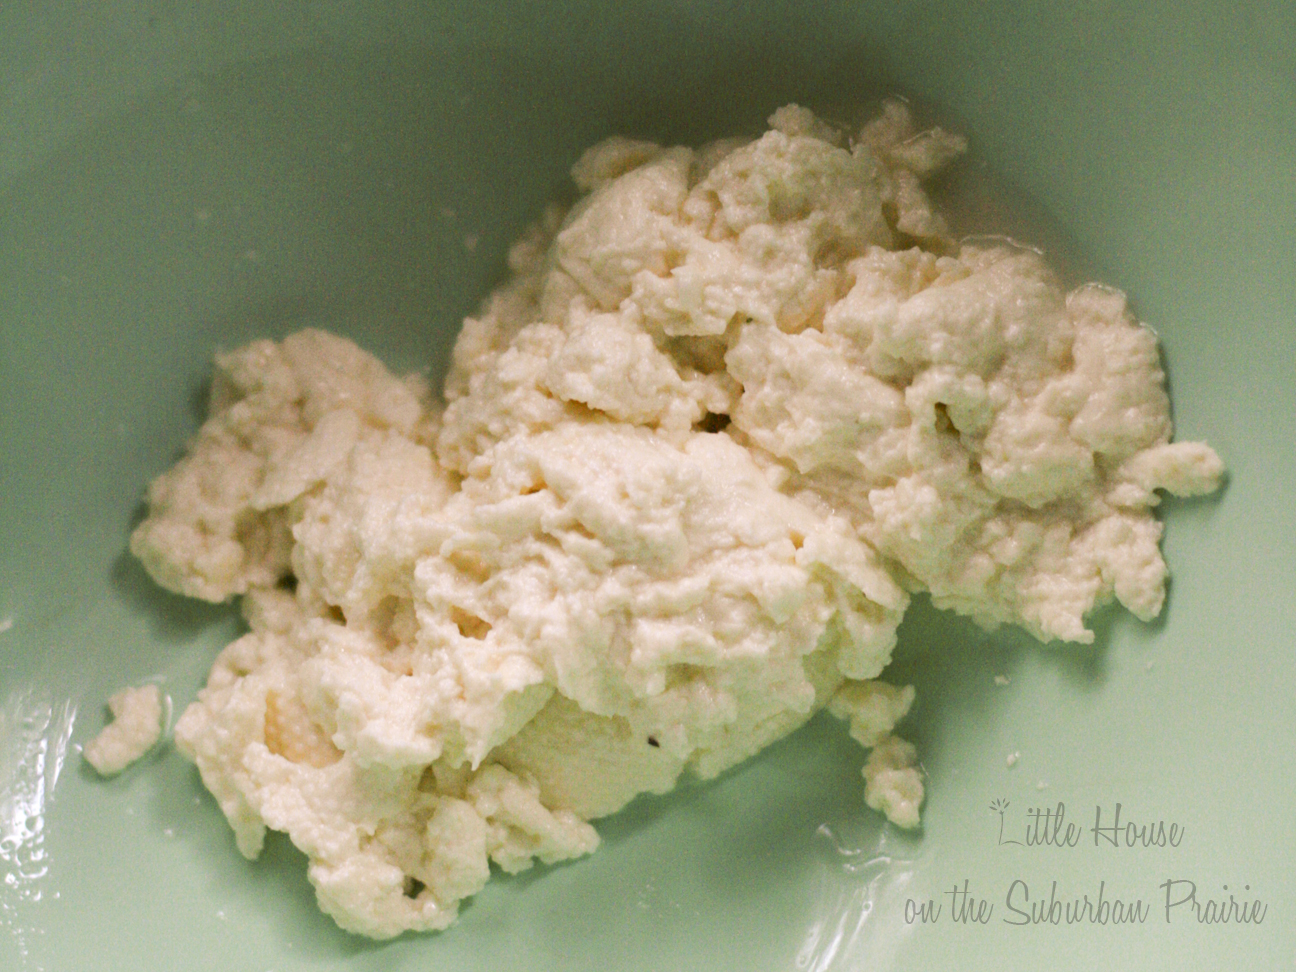
In process, we discovered that making 1/2 cup of ricotta in 5 minutes or less is probably possible, but making the 2 cups that we wanted for our recipe of ravioli wasn't going to be quite so streamlined. We made our ricotta in 2 batches (due to the size of our bowl and microwave) and still the milk took approximately 12-14 minutes to reach 165 degrees, even with our microwave set to high. Apparently twice the milk = triple the time. It's still a much more immediately gratifying process however than it's cheddar cheese cousin, which is aging for 6 months in our pantry (4 months down!). So, it took about half an hour in the end to reach our quota of 2 cups of fresh ricotta. But it was well worth it.

Fresh Cheese!
We make pasta often enough that we have the process pretty speedy at this point. Rolling out the dough only took about 20 minutes so while I did that, Aaron went ahead and mixed our fresh ricotta with the rest of the ingredients for our ravioli filling: parsley, parmesan, salt, pepper, and nutmeg.


For my taste, this recipe uses a little too much parsley. Next time, we may omit it all together and use oregano instead. But we're not entirely decided yet. And we had plenty of parsley growing in our garden, so for this round, it made perfect sense.

Once the pasta was rolled (note, it should be quite thin - almost translucent) and the filling mixed, it was time to construct our food:


Once they were complete, we boiled them for just a couple of minutes and topped them with our freshly made tomato sauce.

The finished product:


Verdict: the fresh ricotta really did make a difference. The raviolis were creamier and less rubbery than the ones we've made with ricotta from the store. The other pro is that we can make exactly as much as we need and not worry about needing to find additional uses for sub-par ricotta. I'm sure we'll do it again sometime.  You should, too!

Serious Eats Recipe for Ricotta

Cheese Ravioli
Originally from Mark Bittman

Ingredients
2 cups fresh ricotta
1/2 cup freshly grated parmesan
1 cup minced parsley
1/2 teaspoon nutmeg
Salt and Pepper to taste


Combine ingredients and fill freshly made pasta dough. Boil for 2-3 minutes until tender. Serve with your favorite sauce.

Tuesday, July 19, 2011

Worms


Worms are one of the few things I look forward to when it rains anymore. Now, it's not that I don't like the rain, but weather patterns over the last couple years have taken every shred of novelty and enjoyment from this particular one. Except for worms. Whenever it rains, I make a point to look at the ground when I'm walking. I'm on the prowl. My eyes are honed-in, looking for any sign of squirming or writhing. If I find any worms crawling on the payment, I grab it and stick in a bag. When I get home, I deposit the worms into our compost bins. It's like bringing in sheep to the fold.

I like to think that when I find a worm and stick them in my bag, I am giving a displaced worm a new home. Left on the road, they'd be run over or eaten; in my compost bin, they'll be able to make a new life for themselves. Aaron & Chrissie's compost bin - land of opportunity. The place where every worm gets a second chance.

What we get out of it is good compost. Worm poop is some of the greatest stuff you can give to your plants. People have caught on and you can purchase worms from nursuries or even online. A box of worms delivered to your doorstep, ready to use straight out of the box! I figure though, why buy them when I can get them for free?

In my opinion (which is definitely opinion because I have no knowledge to back it up), the more critters that get into your compost, the better. All of them do their part to process organic material. I've seen slugs, flies, and spiders on our compost bin too. If I found any of those in the garden, I'd get rid of them, but in the compost bin, they have sanctuary.

Monday, July 18, 2011

Our Perfect Pizza

There have been a few evenings over the last couple of months that I've gotten completely insatiable cravings for pizza, but we haven't had any of the typical ingredients, nor the desire to order a greasy heap of pepperoni from any of the 375289 chains in the area. No, I'm not actually a complete pizza snob... yet. Sometimes I still eat that giant pool of grease with reckless abandon and enjoy every second of it. But on the nights in question, I distinctly wanted something homemade.

Several years ago I went to this pizzaria in Wisconsin. I've also been to Japan. Somewhere in the amalgamation of those 2 places in my brain, I've grown pretty convinced that you can put anything on a pizza.

So, we rifled through our pantry and fridge and found the following:

olive oil
fresh rosemary
goat cheese
pancetta
pink lady apples

Pretty good for a kitchen devoid of tomato sauce. We also had enough staples to make a basic pizza dough, so we went for it.

I should stop here and admit that I have a bit of a crush on pancetta. Seriously. It's not quite as salty as proscuitto, but not as heavy as bacon. It has a big flavor for a small quantity. And it has a very high-class-culinary sounding name. Pancetta is all win, all the time.

But I digress. Here's the pizza pre-oven:


Just looking at it makes me want to make it all over again. Good thing I live in a state with lots of Apples.

Here's the finished product (which is a bit messier looking due to some user error involving the pizza peel):


And of course, the concise recipe since I know you're all going to want to make this yourselves tonight.

Seriously. Do it.

Apple - Pancetta Pizza

Ingredients

1 recipe of your favorite pizza crust
1 tbsp olive oil
1 tbsp fresh, chopped rosemary or to taste
1 cup goat cheese (feta also works well)
1/2 apple (pink lady is our preferred, but anything somewhat tart will do)
3-4 slices pancetta

Instructions:

Preheat your oven as high as it will go. Ours only gets to 525 degrees, which is pretty standard, but if you can get hotter, go for it. If you have a pizza stone, make sure that it's in the oven while it preheats.

Prep the pizza dough. Layer the ingredients beginning with the olive oil.

Once your oven is preheated, place the pizza directly on the pizza stone if you have one, or you may use a baking sheet.  Cook until the crust is just beginning to be golden brown and/or until the pancetta starts to brown at the edges.

Cut and serve!